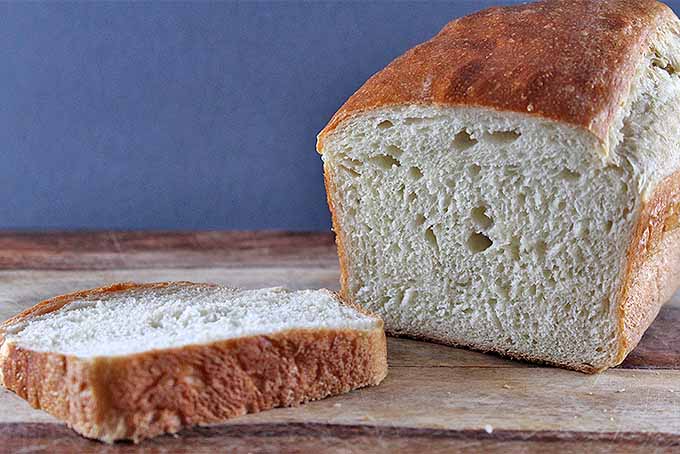
The Ultimate Guide to Baking Perfect Bread at Home
Baking bread at home is a rewarding experience that fills your kitchen with the irresistible aroma of fresh-baked goods. Whether you're a beginner or an experienced baker, this guide will walk you through the essentials of creating perfect homemade bread.
1. Understanding the Basics of Bread Baking
Before diving into the process, it's essential to understand the key ingredients that make up bread. The main components are flour, water, yeast, and salt. These ingredients work together to create the dough that rises and bakes into the loaf.
- Flour: The type of flour you use affects the texture and structure of the bread. Bread flour, with a higher protein content, is ideal for creating a chewy, well-structured loaf.
- Water: Water activates the yeast and helps bind the flour, forming gluten. The temperature of the water is crucial; it should be warm, not hot, to activate the yeast properly.
- Yeast: Yeast is a living organism that ferments the sugars in the dough, causing it to rise. You can use active dry yeast, instant yeast, or fresh yeast, depending on your preference.
- Salt: Salt enhances the flavor and controls the fermentation process. It also strengthens the dough, helping it hold its shape during rising and baking.
2. Choosing the Right Flour
Flour plays a significant role in the bread's texture and structure. The most common types of flour used for bread are:
- All-purpose flour: This is versatile and works for most bread recipes. It provides a soft crumb but may lack the chewy texture you get from bread flour.
- Bread flour: With a higher protein content, this flour produces a chewier texture and helps develop better gluten structure.
- Whole wheat flour: This type of flour offers a denser, more flavorful loaf. You can substitute part of the white flour in a recipe with whole wheat for a heartier bread.
- Rye flour: Often used in rye breads, it creates a denser texture and adds a unique flavor.
3. The Role of Yeast
Yeast is the magic behind bread's rise. It ferments the sugars in the dough, producing carbon dioxide gas that causes the dough to expand. There are two main types of yeast used in bread baking:
- Active dry yeast: This is the most common form of yeast. It needs to be dissolved in warm water before being added to the dough.
- Instant yeast: This type doesn’t require proofing and can be mixed directly with the dry ingredients.
- Fresh yeast: Often used by professional bakers, fresh yeast is highly perishable but creates a more complex flavor.
4. Mixing and Kneading the Dough
The process of mixing and kneading dough is essential for developing the gluten that gives bread its structure.
- Mixing: Combine your dry ingredients (flour, salt, yeast) in a large bowl. Gradually add warm water until the dough begins to come together.
- Kneading: Once mixed, knead the dough on a floured surface for about 8–10 minutes. The goal is to stretch and fold the dough to create a smooth, elastic texture. If the dough is too sticky, add a little more flour; if it's too dry, add more water.
5. The Importance of Rising (Fermentation)
After kneading, the dough needs time to rise. This step is crucial for developing the flavor and texture of the bread.
- First rise (bulk fermentation): Place the dough in a greased bowl, cover it with a damp cloth or plastic wrap, and let it rise for about 1–2 hours. The dough should double in size.
- Punching down: After the first rise, gently punch the dough to release the air bubbles, and then shape it into a loaf.
- Second rise: Allow the dough to rise again in the loaf pan for 30–60 minutes. This final rise helps create a light, airy texture.
6. Shaping the Dough
Once the dough has risen, it's time to shape it into a loaf. You can shape it into a traditional round boule, a long baguette, or place it into a loaf pan. The shaping process helps determine the bread’s final appearance and texture.
- Boule: To shape a round loaf, gently fold the edges of the dough towards the center and pinch them together. Turn the dough over, creating a smooth top.
- Baguette: For a baguette, roll the dough into a long, cylindrical shape, making sure to tuck the ends tightly.
- Loaf pan: If you’re using a loaf pan, simply shape the dough into a rectangle and place it in the pan, seam-side down.
7. Baking the Bread
Preheat your oven to the required temperature, typically between 375°F and 475°F (190°C–245°C), depending on the recipe.
- Steam: To achieve a crispy crust, create steam in the oven by placing a shallow pan of water on the bottom rack. You can also mist the dough with water before placing it in the oven.
- Baking time: Bake the bread according to the recipe’s instructions. Bread typically takes 25–45 minutes, depending on its size and shape.
- Testing for doneness: The bread is done when it sounds hollow when tapped on the bottom. You can also use a thermometer; the internal temperature should be between 190°F and 200°F (88°C–93°C).
8. Cooling the Bread
Once your bread is out of the oven, allow it to cool on a wire rack. Cooling is essential for the bread to set its structure and for the flavors to develop. Resist the temptation to slice into it too soon, as the bread continues to cook slightly as it cools.
Baking bread at home is a skill that improves with practice, so don’t be discouraged by early attempts. Enjoy the process, and soon you’ll be able to create bakery-quality loaves right in your kitchen. Happy baking!

